
Custom cargo door panel for Land Rover Discovery 1*
Having recently finished a cargo space aluminum shelf it was time to shift to a more complex project. I’d seen some creative ways that other Disco owners had used sheet metal to fabricate custom cargo door panels that were more functional than the stock door cards. Inspired by these ideas, and wanting a panel that met my needs, I set out to craft something that would serve multiple functions.
*This design can be adapted to any Rover with a barn door style rear door, including the Discovery 2, Defender, and Series models.
The problem
The stock door panel on a Discovery covers a lot of real estate but doesn’t offer much function beside a pocket and a subwoofer. I wanted to replace this with a panel that would expand the utility of the cargo space. Let’s be honest: my days of alpine climbing are mostly behind me and I spend more time car camping (also known to some as “overlanding”) these days than I do shivering on Mount Rainier. The cargo area of the Discovery is a ready-made work space that has the potential to become a backcountry kitchen and storage surface. I wanted my panel to perform these functions:
- Hold my camp stove on a folding table
- Retain the storage of the factory door pocket
- Hold a range of objects secured by a modular tie-down system
- Open beer bottles
As with the shelf, the panel must be light, clean-looking, and quiet (no rattles). Many people have been down this path before. I found some inspiration in projects others had done, like this example by Brett Fritzler:

Clean and simple, with subwoofer retained behind the panel.
Materials and costs
In my research I found a stainless steel cargo door panel sold by Columbia Overland for $140 (excluding shipping). This bare-bones option became my benchmark: could I make something with more functionality for about the same price? Here’s what I used:
- Aluminum sheet (door panel), 48” x 24” x 0.063”, $41 including shipping
- Aluminum sheet (folding table), 24” x 12” x 0.063”, $12 including shipping
- Zip ties
- Hinges, $5
- Molle panel, $35 shipped from Greyman Tactical
- Molle pouch, $20 shipped
- Hardware, including rivnuts, bolts, washers (metal and rubber), rubber grommets, cord, nylon spacers, cordlock, $30
- Paint (same truck bed liner used on the shelf project), $12
- Bottle opener, $12
All told my materials were about $179, so for nearly $40 more than the Columbia Overland panel I specified a significantly more functional version.
Tools used
- Panel separator tool
- Box cutter/razor blade
- Angle grinder with cutting blade
- Vacuum cleaner
- Tin snips
- C-clamps
- Files (half-moon and rat tail)
- Drill and bits
- Rivnut riveter
- Screwdriver
- Felt-tip pen
- PPE: glasses, gloves, ear protection, and dust mask. Safety first!
Construction
First I removed the factory door panel. This involves removing other components before you can actually separate the panel: door latch trim and subwoofer. I kept all the hardware in a dish. The subwoofer didn’t figure into my design: it’s heavy, bulky, and if I want to enjoy music the interior of a Discovery is not my first choice. The panel separator tool helps ease out the trim posts without breaking them. It’s worth keeping these and the original panel if you ever want to reinstall them (i.e. you want to sell your truck but keep the custom panel).
Inside the door recess I secured the speaker cables with zip ties. No need to have those things rattling around.
Using the box-cutter I sliced off the plastic grommets that the trim posts attach to. You need the holes in which they sit to be empty: that’s where the rivnuts will go. Keep the vacuum handy to suck out any plastic bits that fall into the door cavity.
With a small Philips screwdriver I removed the plastic pocket from the door card. Whether or not you want to keep the pocket, you need to remove it for making the template.
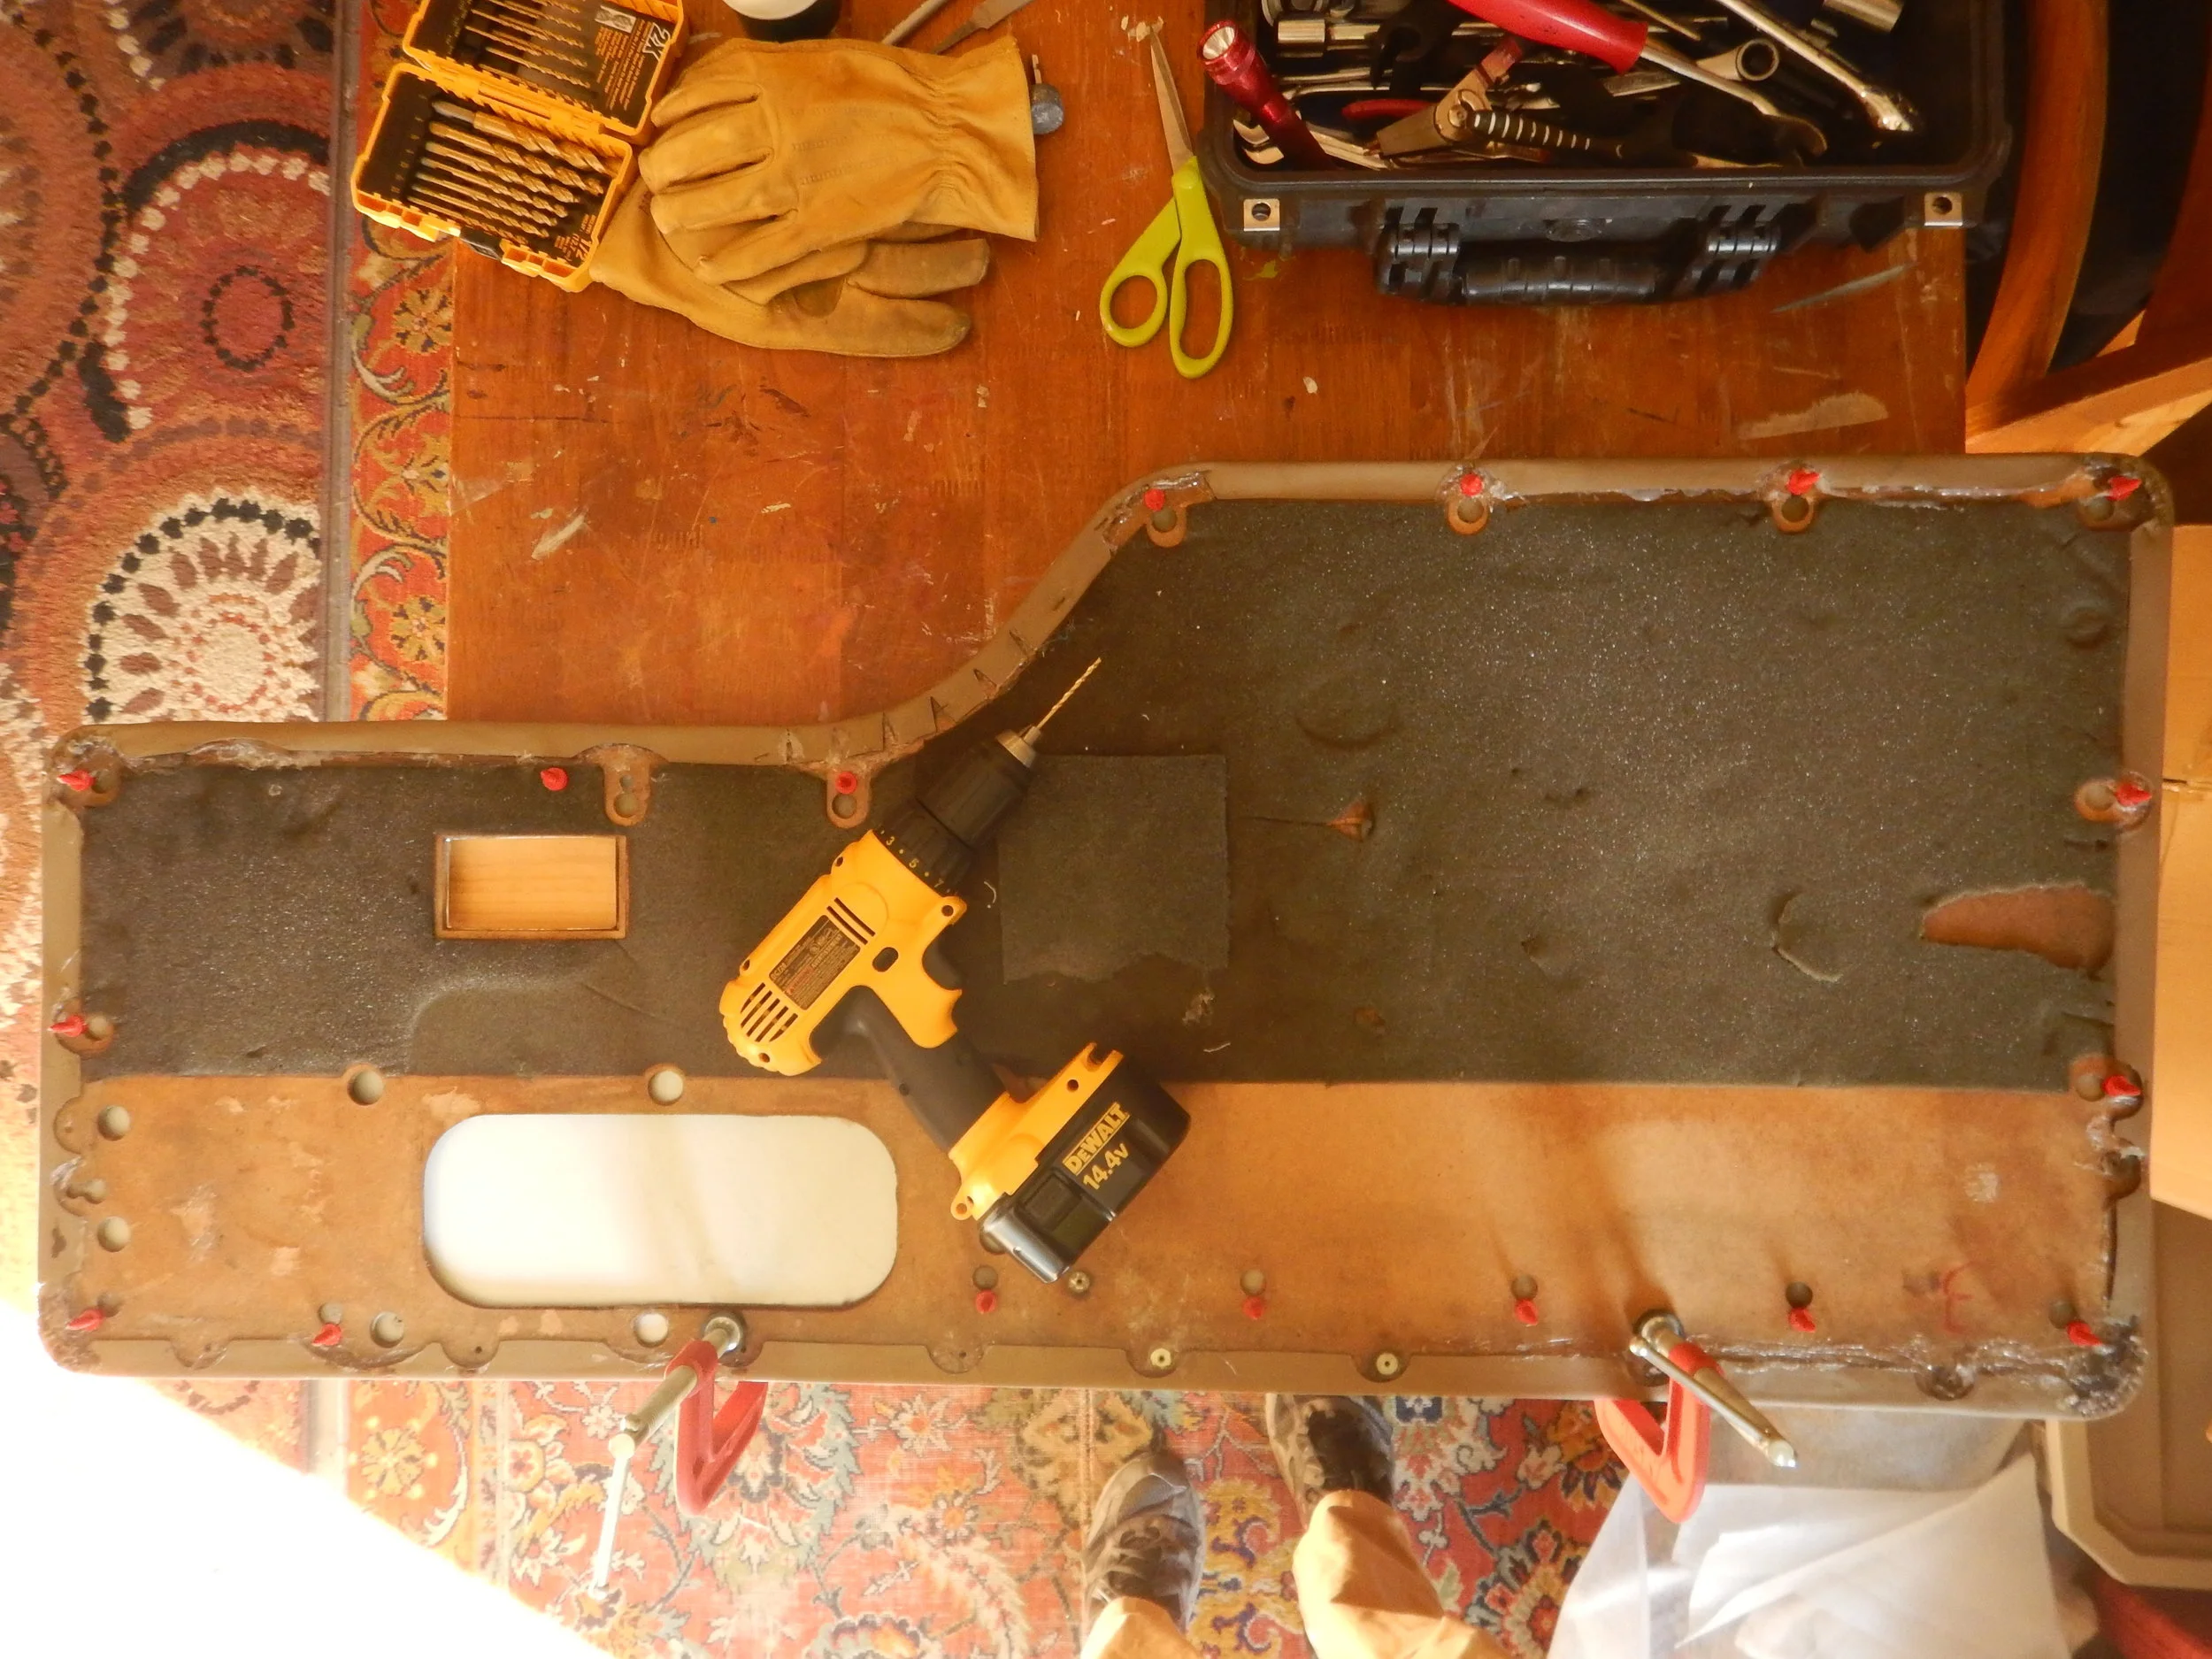
Laying the door card face down on the sheet metal, I traced around the edge with the felt-tip pen to create a template. It is difficult to size the panel correctly: there is a slight beveled recess into which the panel will fit inside the door. Cut the panel too small and there will be a gap, cut it too big and it won’t fit. I erred on the side of cutting the panel too big knowing that I could file it down. Don’t forget to draw the cutout for the door handle trim.
After clamping the sheet of aluminum to the bench I cut along the lines with the angle grinder. The curves took a steady hand. If you screw it up there’s always the file. Don’t worry about precision on the door handle cutout – the trim piece will cover any imperfections as long as the size is generally accurate. Vacuum as you go, metal dust is messy.
I traced curved lines on the corners using a round object as a stencil, then with the tin snips cut the outer corners so they are rounded.
Holding the panel up to the door I saw where I needed to shave down the edges and went to work with the files. This was more time-consuming than I had expected since I had cut the panel conservatively.
Once I was satisfied that the panel was a tight, flush fit inside the door, it was time to start drilling. I laid the factory panel on top of the aluminum panel and clamped the two together. Using the center of where the body panel trim posts had been, I drilled pilot holes for the bolts to pass through that would hold the panel to the rivnuts.
Clamped panels with original red trim posts still in place.
On holding the panel up to the door I realized that this method of approximating where the mounting holes were located was not the most accurate. With the rat tail file I expanded some holes in the panel so they covered the mounting points in the door. Washers will conceal any imperfections if you don’t get it exactly right with the drill.
With the rivnut tool I installed the rivnuts in the mounting holes. Be sure to order wide-flange rivnuts for maximum grip against the sheet metal. Being a metric guy I used M5 rivnuts and hardware (M6 was too big), but ¼ inch should also work if you prefer.
Setting rivnuts in mounting holes on door.
I positioned the accessories on the aluminum panel to see how they would fit together. Given the location of the door pocket, the folding table would need a corner rounded off so it wouldn’t protrude above the edge of the panel. Tin snips and file did the trick.
The mock-up. So far, so good.
Again, using the stock door card as a template clamped to the aluminum panel, I drilled holes for the plastic pocket. I also measured and drilled holes for the shelf hinges, molle panel, and bottle opener. I drilled a set of holes for the hinge hardware to sit inside so the closed table would be flush against the panel. Tip: before you drill holes in the panel, check what sits behind it in the door. If you have to drill holes through sheet metal in the door that is no big deal, but you don’t want to mount something so the hardware gets in the way of the door handle mechanism or any other important bits.
With the components in place, I bolted the panel to the door to make sure that all the holes were correctly positioned and the hardware wasn’t sticking into sheet metal on the door. I found a couple spots that I had to drill out to accommodate the hardware and was satisfied that everything sat flush.
After disassembling everything I painted the panel and the bottom of the folding table with tan truck bed liner. This is an optional step, some may prefer the bare metal look, but I wanted a finish that would match my cargo space shelf and not look too Mad Max.
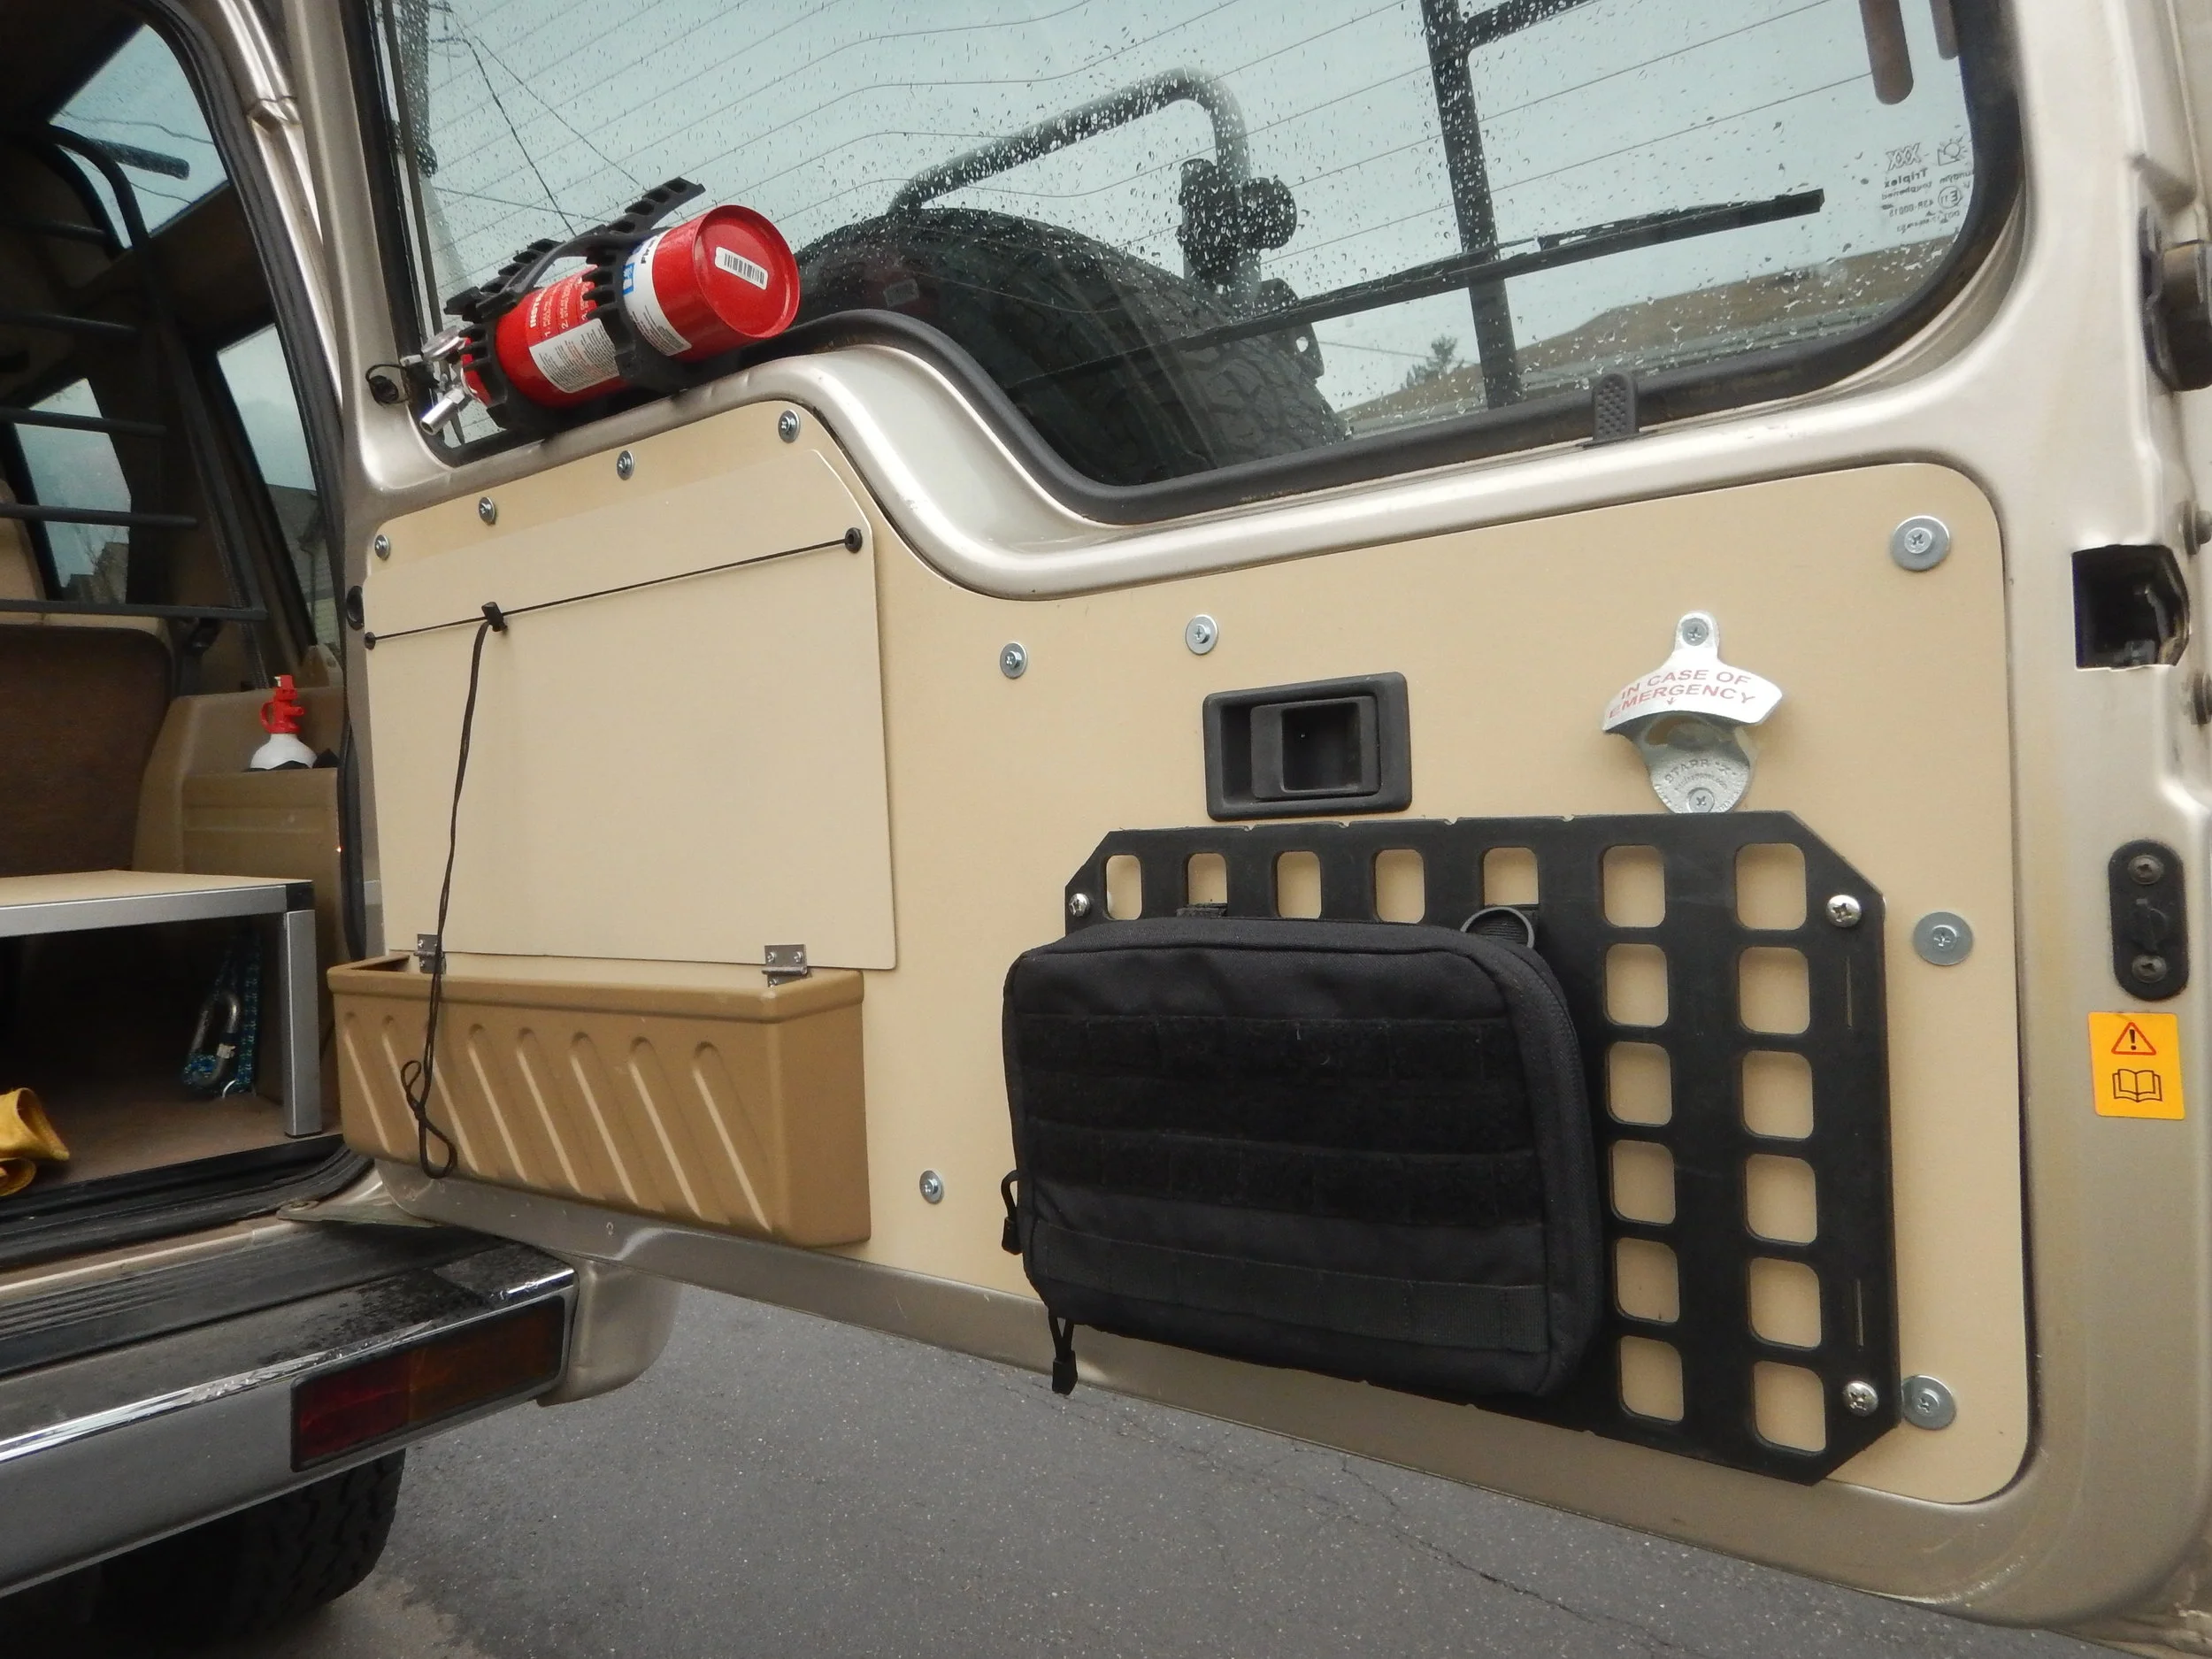
Once the paint had cured, I reassembled everything and bolted the panel to the door, inserting rubber washers between the panel and the rivnuts. I could see there were still a couple minor fit issues involving hardware not sitting flush against the inner door structure, so one more round of fine-tuning was in order. Here is the nearly-finished product with one or two little adjustments still needed.
The dress rehearsal.
Table secured against panel.
Robber grommets protect cord from abrasion against metal edges.
Note on the table: I ran a length of cord through the grommets on both the panel and table to form a closed loop (connected the ends with a double fisherman’s knot), then tied it off such that the length of cord was perfect for holding the weight of the loaded table. The advantages of this approach are simplicity and silence – the cordlock holds the table in place against the panel with no rattling. It’s not foolproof, however: I will need to take care with the stove on the table so as to avoid melting the cord.
Note on the molle panel: I haven’t been a subscriber to the idea of tactical gear, but this particular panel is ideally suited for my purposes. Sourced from Greyman Tactical (thanks to Travis for great customer service) the design of the grid allows me to quickly attach/detach molle pouches to the panel and also to use it as a mounting surface for irregularly-shaped items I might want to keep handy, like a first aid kit, folding kitchen bag, or recovery gear. The panel and pouch added $55 to my materials cost but are a worthwhile investment considering the versatility that the panel adds to the setup. Plus the Greyman Tactical components are made in the USA, which is a selling point for me.
With cam straps I can attach bulky items to the panel.