

Cargo space shelf project for Land Rover Discovery 1
My dog, Bastien, loves to travel and camp. He knows it’s time for an adventure when I start loading gear into the Land Rover. It can be challenging to pack equipment into the cargo space in a way that is comfortable and safe for the dog while also convenient for me to access. I built a shelf for the Land Rover Discovery cargo load space that effectively meets these needs. This write-up details the design and construction process.
The Problem
Bastien on the plastic bins. Not the most comfortable for him, not the most convenient for me.
The Discovery has a cargo space behind the rear seats totaling 48 cubic feet/1300 liters. This space is short but tall, owing to the stepped roof line of the vehicle. When going on camping trips with Bastien I like to pack equipment in either plastic tote bins or Pelican cases. This creates a flat surface on which to place Bastien’s bed. It is an efficient use of space, however when Bastien is sitting on top of the cases I can’t access the contents. A shelf would solve the problem by allowing me to slide the cases in and out of the truck without displacing the dog.
Design
I’ve seen home-made load space shelving designs that work well, most using lumber and plywood, but none looked exactly like what I wanted. Three factors informed my design.
- Weight: the shelf must be light. The Discovery has a payload of 1,500 pounds but that doesn’t mean you have to use it all. The shelf won’t be in the truck all the time and I want it to be easy to remove and install for both me and my wife.
- Strength: Bastien weighs 65 pounds and I might want to load other things on the shelf, as well.
- Volume: in order to retain as much usable cargo capacity as possible the shelf must not occupy much space itself. Every cubic inch that the shelf takes up is a cubic inch of capacity lost. Plywood and lumber designs were bulkier than I wanted. This mattered both for use in the truck and for storage between trips.
I achieved these goals by fixing a sheet of aluminum to a frame constructed of extruded 1” square aluminum tubing. The company International Designs makes a product called EZ Tube that was well matched to the design. They offer tubing, different shapes of connectors, and end caps – everything needed for the frame. If desired, they also can cut the tubing and drill holes in it for you. I chose rivets to fix the aluminum sheet to the frame. My frame design involved 3 legs along the edge of the shelf closest to the rear door. The other end of the frame has no legs. Instead, the corners of the frame rest directly on the wheel wells, further reducing the volume of the shelf. My original design included a fourth leg in the middle of the long side of the frame opposite the 3 front legs, but the frame was plenty rigid without it.
Materials and costs
- 1 sheet of aluminum, 48” x 24” and 0.063” thick (purchased from Shapiro Metals, $41 including shipping).
- Rivets, 5/32” ($7 for a pack of 50, of which I used 21). I used aluminum rivets for material consistency with the tubing and sheet.
- Silicone sealant ($5 tube). Optional but recommended.
- Spray can of truck bed liner. Optional ($14).
- 4 lengths of tubing, 48” each ($38.12). It’s an obvious statement, but order sufficient tubing for the lengths you plan to cut. The tubing comes in 48” or 96” lengths. I made a list of the lengths of all the tube sections I would need to figure out how many uncut pieces to order.
- Connectors ($18.80). These come in multiple configurations depending on how many tubes you want to join at an intersection. I used 3 different kinds for the frame: 2, 3, and 4-way.
- Tube end caps ($2.20)
- Shipping for all EZ Tube materials ($23.32)
Total cost for materials used was about $136 including shipping. A lumber and plywood shelf would cost a fraction of this but the premium was worth the weight and volume savings.

Tubing, connectors, end caps, and sheet.
A note on sizing: the width of the Discovery 1 load space above the wheel wells is about 50” so the aluminum sheet is not a perfectly snug fit. The extra room makes for easy installation and removal of the shelf. If you want a permanent or tighter-fitting shelf then consider a custom-cut sheet of aluminum or add spacers to the outer edges of the frame.
Tools needed
- Angle grinder with cutting wheel or hacksaw for cutting the tubing
- Machine file for finishing edges
- Clamps for holding materials to workbench while cutting
- Drill and bits
- Riveter
- Rubber mallet
- Tape measure
- Square edge
- Felt-tip pen
- PPE: glasses, hearing protection, dust mask, and gloves. Safety first!
Construction
With all tools and materials are on hand construction took me about three hours.
1. Measure and cut the lengths of tubing to fit the dimensions of the aluminum sheet in the configuration you desire. Use the pen and square edge to mark the cuts on 3 sides of the tubing. Be sure to include the dimensions of the connectors you plan to use. Make sure the ends of the tubing are cut squarely so they fit the connectors well.
2. Use the machine file to remove burrs from the cut surfaces of tubing. I also filed bevels along the tubing’s inside edges to ease assembly with the connectors.
Beveled inside edges of the tubing.
3. Line up all the cut sections of tubing and connectors along the edges of the sheet without assembling them to verify that your frame fits the sheet correctly.
4. When you are satisfied that the tube sections are properly sized, assemble the frame. Using the rubber mallet tap the tubing onto the connectors. Before assembly I considered smearing epoxy on the connectors but the fit is tight enough as-is. End caps protect the load space from bare metal edges of the tubing and also add a small amount to the tube length.
5. My aluminum sheet came with a protective film on one side which I removed before fixing the sheet to the frame.
6. Place the sheet on top of the frame. Measure and mark where you want to place your rivets. I opted for six-inch spacing between rivets. Clamp the sheet to the frame and drill holes for the rivets through both the sheet and top wall of the frame tubing. Keep in mind that the ends of the connectors extend into the tubing and you won’t be able to place rivets close to the intersections. If you want to anchor the sheet at the connectors you might drill into the plastic and use wood screws. Test the size of each hole by inserting a rivet.
It's good!
7. Squeeze a bead of silicone along the surface of the frame on which the sheet will sit. This won’t do much for adhesion but will fill gaps between the frame and the sheet. The sheet doesn’t sit perfectly flush at the connectors. More importantly, the silicone will prevent metal-on-metal rattling.
Quiet shelf = happy occupants.
8. Position the sheet onto the frame. Place rivets into all the holes to hold the sheet in place. Using the riveting tool, compress all the rivets to secure it to the frame.
9. Use the machine file to round the edges of the sheet. The edge should sit flush with the frame but rounding off the edges will reduce the chance of them catching on or cutting something.
A little something to take the edge off.
10. I didn’t want Bastien’s feet or bed to slide around on the top of the shelf so I taped the frame off and sprayed the surface of the top sheet with truck bed liner.
Finished product. Note the spacers on the back corners of the shelf. These press against the trim, keeping the shelf snugly centered. Cases fit neatly underneath with additional room for other gear.
Conclusion
The finished shelf weighs 11 pounds (5kg) and is a breeze to install and remove. It takes up very little space in the garage. Pelican cases and plastic tote bins fit underneath. There is plenty of room on top for Bastien and his bed – he certainly seems to like it. Would I do anything differently? Yes: the frame is over engineered. I’d omit the middle leg on the door side of the frame and possibly leave out the cross-brace tube section. The shelf works fine sitting in the cargo space, but for extra security I may find a way to anchor it to the floor of the truck. I drive gently off-road but don’t want gear bouncing around in the back. The cost of materials to achieve the weight and space savings is high. For me the outcome was worth it: I didn’t want a lumber and plywood shelf but others may accept the weight and volume trade-offs for the lower material costs. The EZ Tube materials are strong and would be well suited to other weight-bearing applications like making a sleeping platform in the bed of a pickup truck. Creative minds will easily adapt this design to suit other models.
"Are we going somewhere?" No, sorry, Bastien, this is just for the photo shoot.
UPDATE January 28, 2017
To increase the safety of the design I modified the shelf to secure it to the floor of the cargo area. Parts used:
- Pair of single-eyelet D-rings
- Pair of double-eyelet D-rings
- Fender washers
- Rubber washers
- M5 hardware with nyloc nuts
- Spectra slings and carabiners (other materials may serve the same purpose, I happened to have these on hand)
Steps:
1. I drilled holes through the sides of the outer frame rail on the shelf. I bolted a D-ring to the outside face of the frame rail, secured with nyloc nuts.

single-eyelet D-ring bolted to the shelf frame rail.
2. I removed the carpet trim and peeled back the carpet and padding. This is a good time to check your floor for moisture.
3. I positioned the shelf where it will sit and lined up the double-eyelet D-rings on the floor directly beneath the D-rings on the shelf, marking the points to drill with a pen.
4. I checked under the truck to see where the drill would punch through. The areas were clear - you don't want to drill a hole in anything else and neither do you want to end up with bolts protruding into inaccessible areas.
5. I drilled the holes in the floor and secured the double-eyelet D-rings with rubber washers, fender washers, and nyloc nuts. I clamped a vise-grips onto the nuts while tightening the bolts from inside the cargo area.

double-eyelet D-ring bolted to the floor. On the other side of the floor are the rubber washers, fender washers, and nyloc nuts.
6. I vacuumed out all the metal shavings, then using an X-acto knife I sliced holes in the foam and the carpet to allow the D-ring to stick through the layers.
7. I replaced the foam and carpet, bolted back down the trim piece, and vacuumed out the cargo area for good measure.
8. From my bin of climbing equipment I fished out some short Spectra slings and a couple carabiners from my collection of bail gear. With strengths of 23kN and 18kN respectively, these are not going to be the weak links in the system. I threaded the slings through one D-ring and attached them to the other with the carabiners. The added components will keep the shelf (and whatever I place beneath it) secured to the floor. Voila.
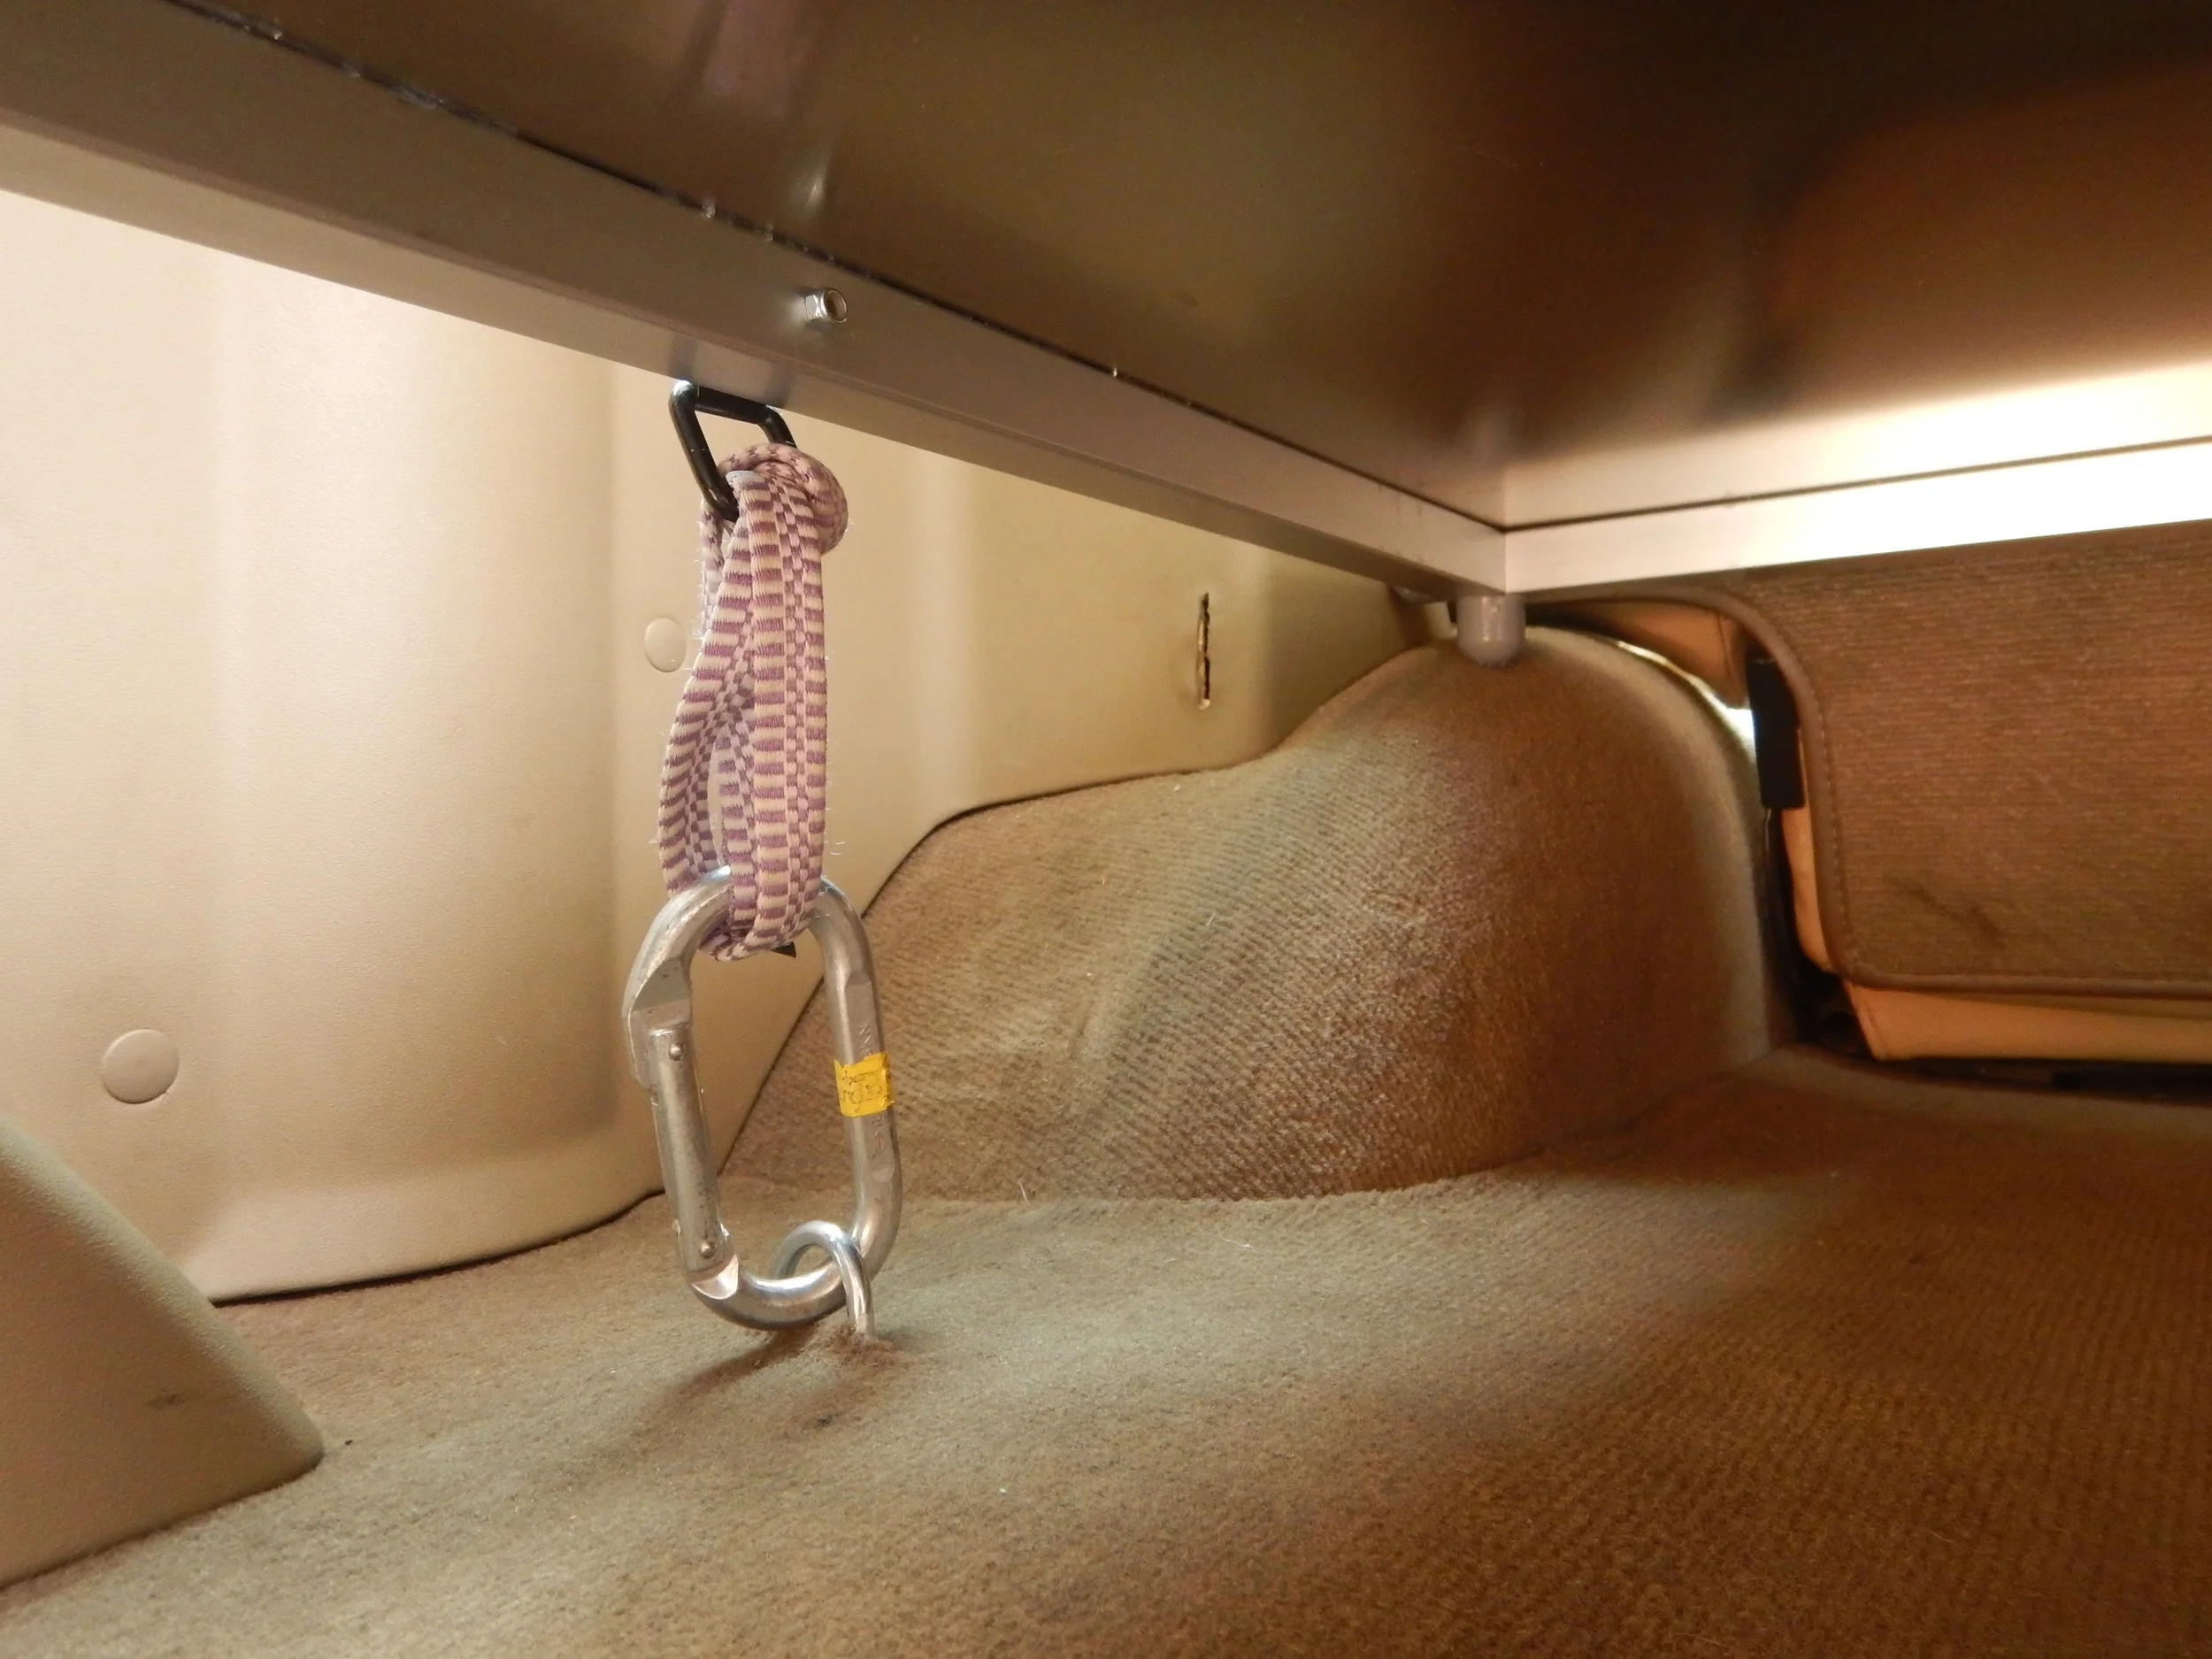
Finished product. Spectra sling and garden variety carabiner.